It is possible to use the Scheduled Reports feature to send a Scheduled Report in CSV format to an email account that is monitored by Microsoft OneDrive. Power BI can then be connected with OneDrive to pull your reports and then process them in any way you see fit. This article will provide the foundation for your organization to use Power BI with your Issuetrak reports.
Prerequisites
- Microsoft OneDrive Account
- Microsoft Azure Account
- Email provider and credentials that can be connected to Azure
Create a New Logic App
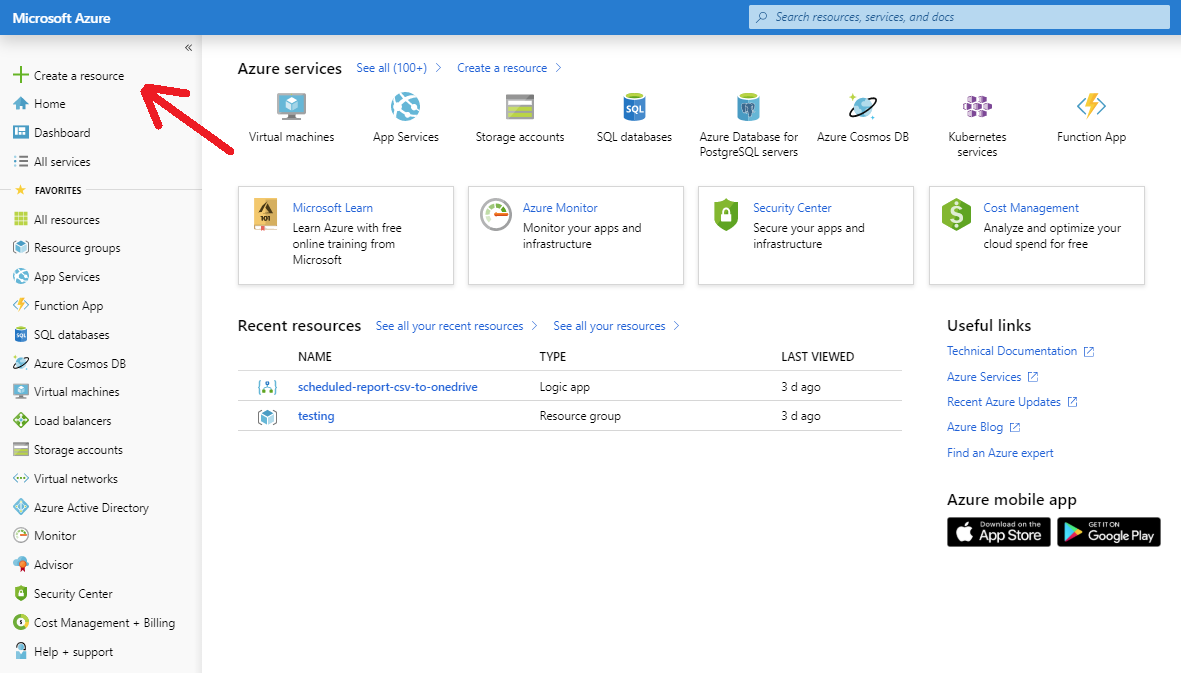
Sign in to the Azure Portal, then perform the following:
- Expand the lefthand menu by clicking the >> chevron icon.
- Click Create a Resource.
-
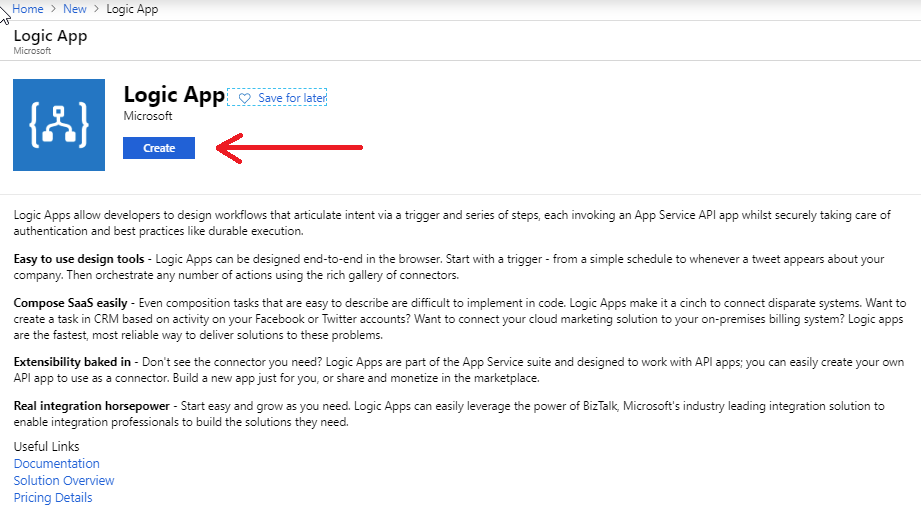
Type "Logic App" into the Search the Marketplace search box, then select "Logic App" from the resulting dropdown of search results.
- In the Logic App pane, click the Create button.
If you are presented with a pane that indicates that you should "Create a free account" then your account may not have permission to access Logic Apps. It will be necessary to contact the account administrator for your organization.
-
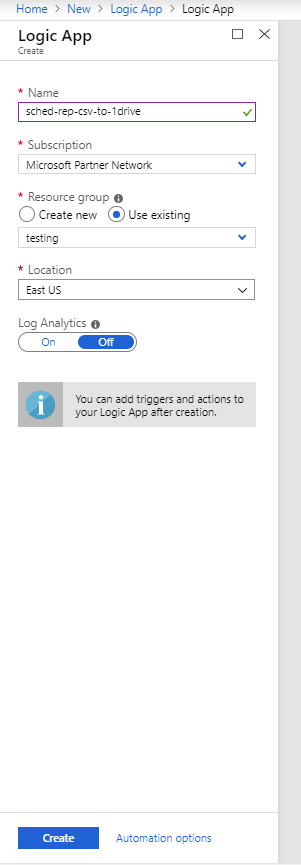
Enter a name for your Logic App. The name can only contain letters, numbers, or the following characters:
- - [hyphen]
- ( [left parenthesis]
- ) [right parenthesis]
- , [comma]
- . [period]
- _ [underscore]
- Enter a new Resource Group or select an existing one.
- Select a Location.
- Click the Create button.


Configure the Logic App
We will now configure the Logic App that you just created.
For the purposes of this article, we will provide the steps for configuring this service to utilize a Gmail account. You will need to choose the settings that work for your own email provider.
Within the Azure Portal:
- Expand the lefthand menu by clicking the >> chevron icon.
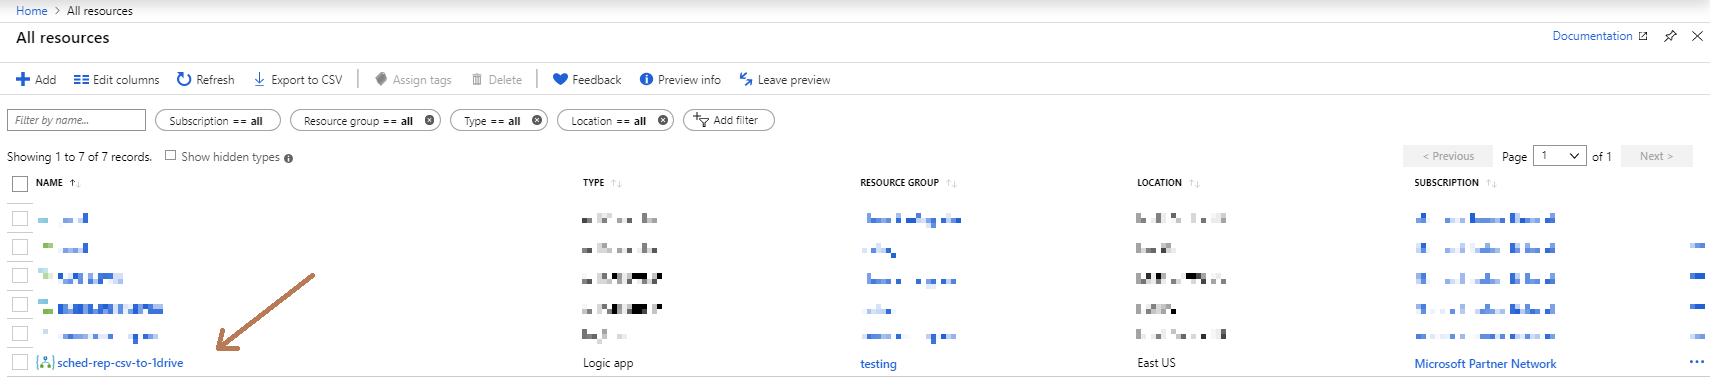
- Click on All Resources along the left-hand menu.
- Search for and click on the name of the Logic App that you created in the previous section. It's possible that the Logic App you created won't show up immediately, so it may be necessary to refresh the page periodically until it appears.
-
If you aren't taken directly to the Logic App Designer, then look for Development Tools in the new menu that appears and choose Logic App Designer beneath that.
- Within the Logic App Designer pane, click the Blank Logic App button under the Templates menu.

-
In the Search Connectors and Triggers search bar, enter "email". The search results will show the first two rows of results. Choose the down arrow beneath the first two rows to expand all of the search results.
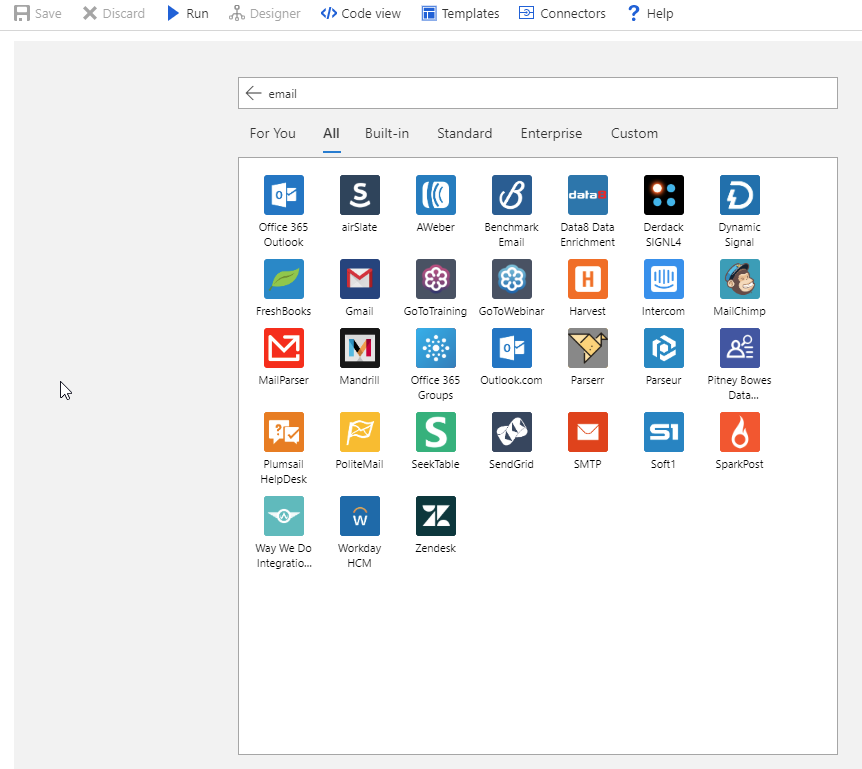
-
Choose the Gmail icon or the email provider that applies to your organization.
-
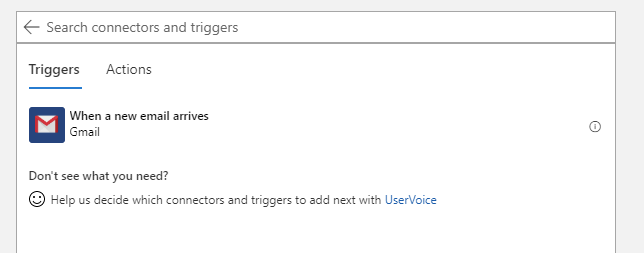
Choose the trigger that indicates "When a new email arrives".
If you've already created a Logic App Trigger connection to your email account, then you can skip to step 9. If you haven't previously created a Logic App connection to your email service, then you will be asked to sign in. With Gmail, you'll need to:- Click the Sign In button to open a popup window that will allow you to sign into your Gmail account.
- After successfully signing in, choose Allow to allow the Logic App to access your Gmail account. This will create an Azure Resource of the type called "API Connection" that can be maintained from the "All Resources" option on the main Azure Portal menu.
-
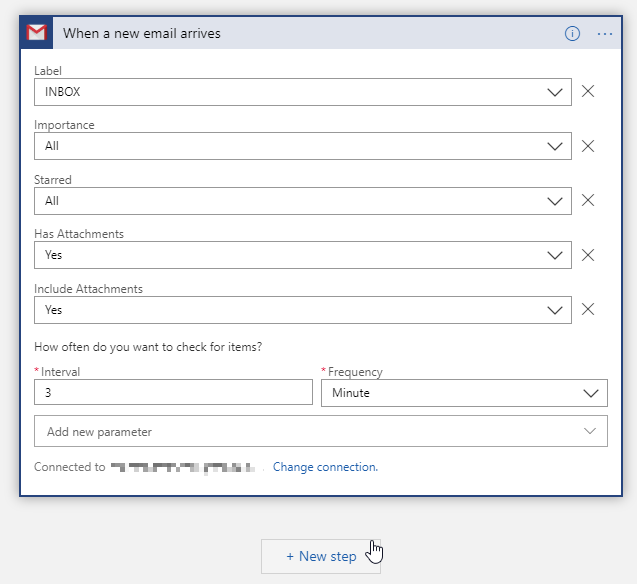
On the "When a New Email Arrives" pane, select Yes for the options "Has Attachments" and "Include Attachments".
-
Enter a value for the prompt "How frequently do you want to check for items?" The default value is every 3 minutes.You may add additional "Parameters" if desired, such as limiting to a specific "From" email address.
-
Click the + New Step button.
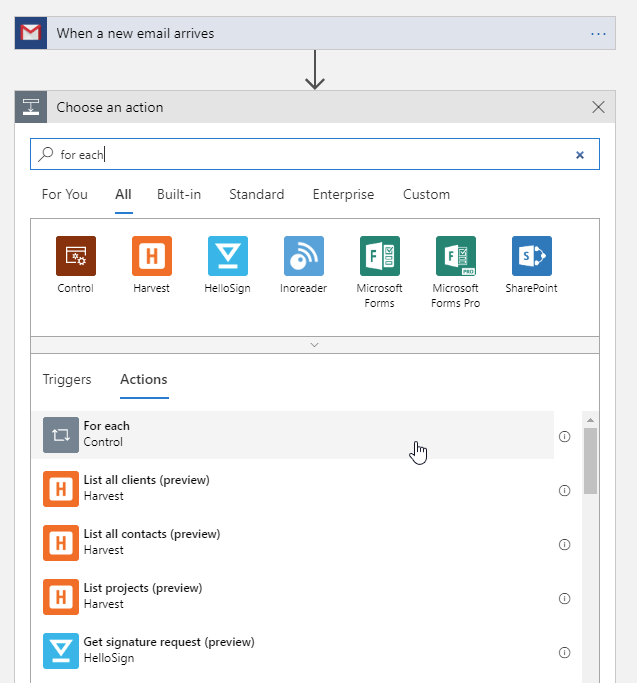
- Enter "For Each" in the search bar for this new step, then select "For each" under the "Actions" list.
-
Click within the "Select an Output" box and select Attachments from the panel that opens next to the box.
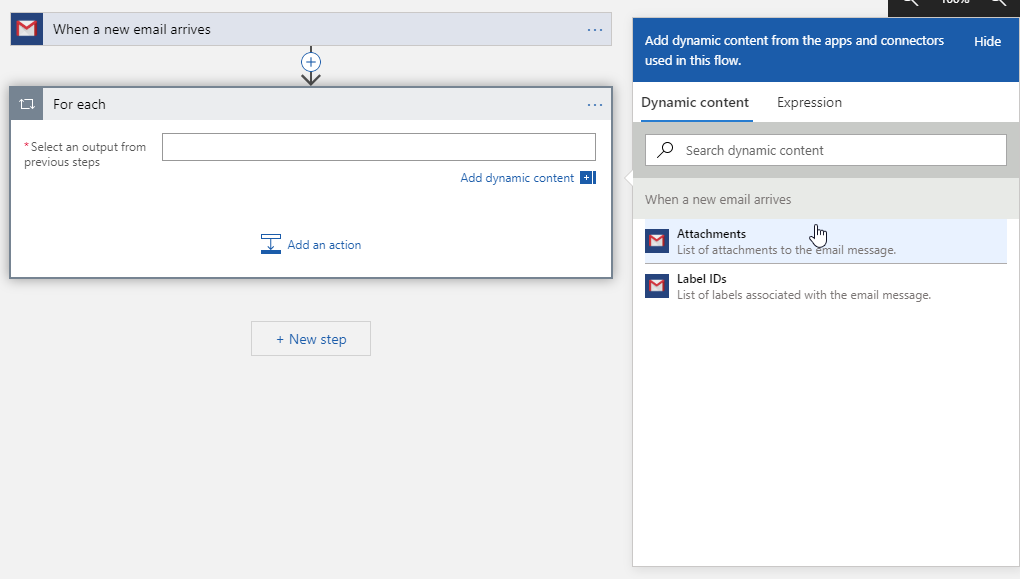
-
Click the Add an Action button at the bottom of the "For Each" panel.
- Enter "condition" in the search bar for this new action.
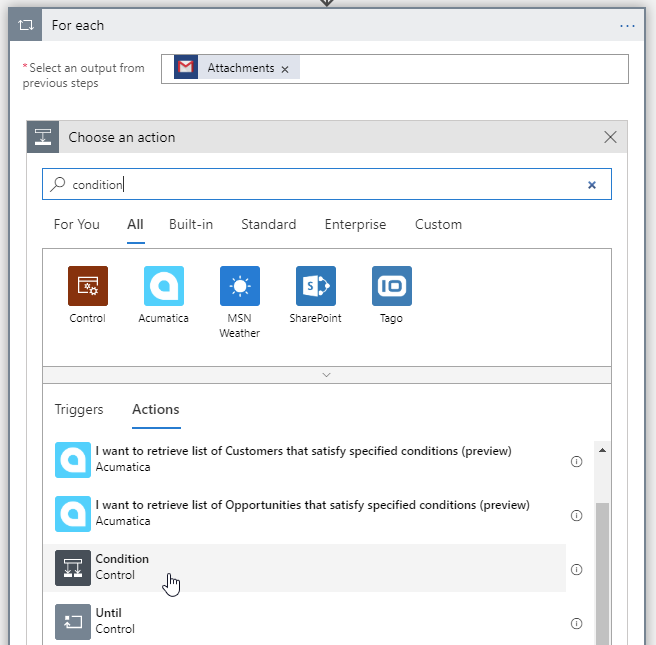
-
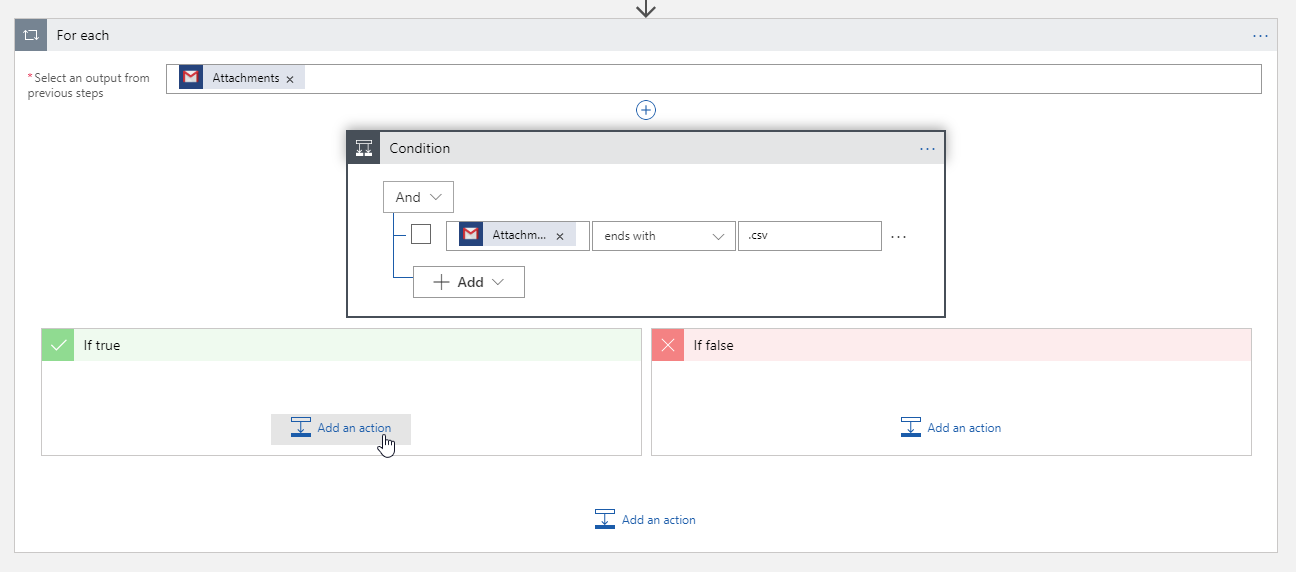
Select Condition Control in the Actions list below.
- Click in the first "Choose a value" box and select Attachments Name from the panel that opens next to the box.
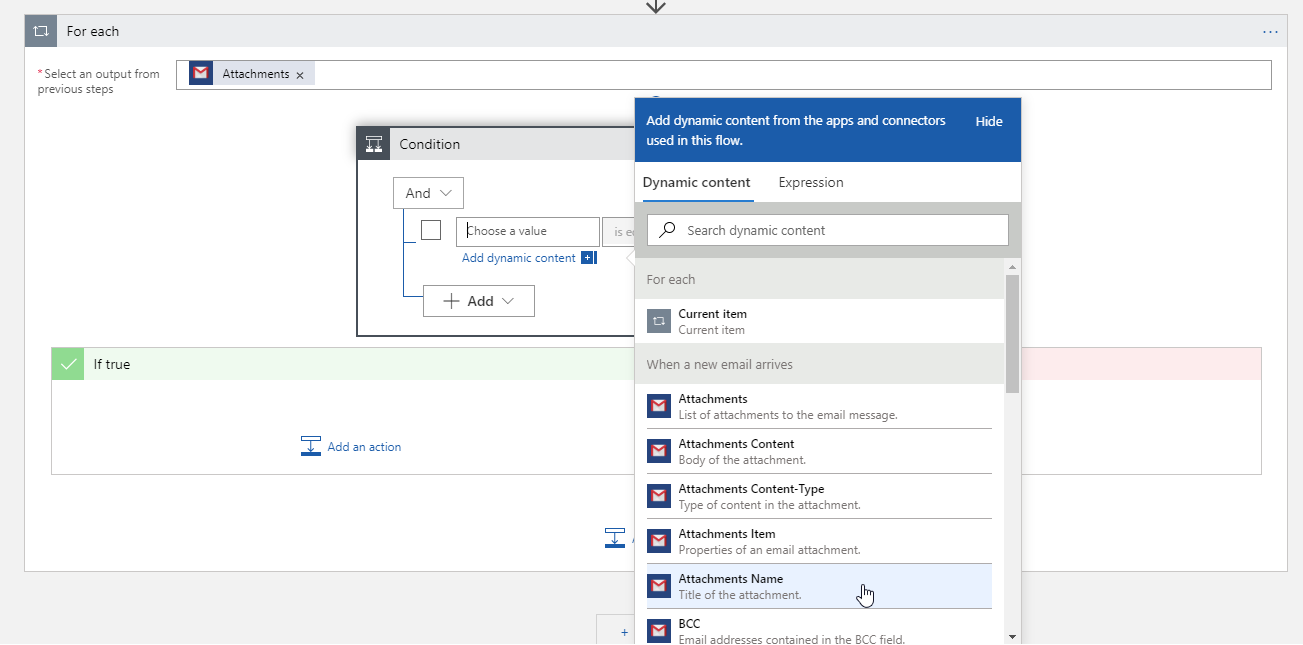
-
Click on the Is equal to dropdown and select "ends with".
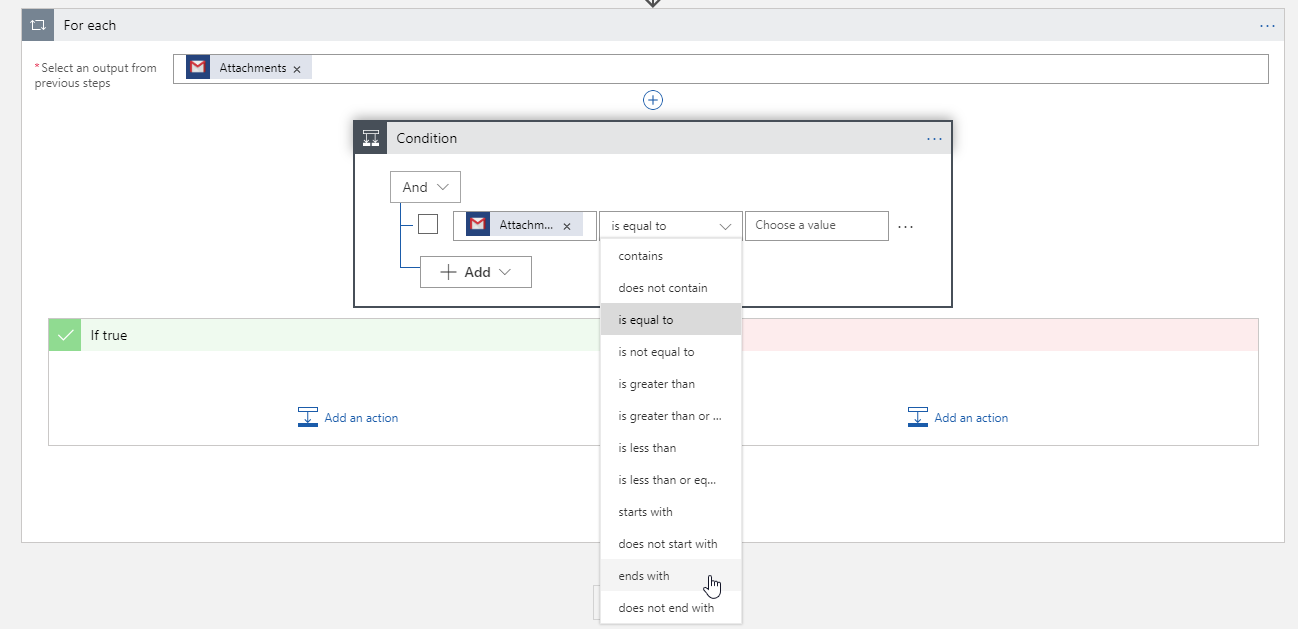
-
Click in the second "Choose a value" box and enter .csv.
- Click the Add an Action button at the bottom of the "If true" panel.
-
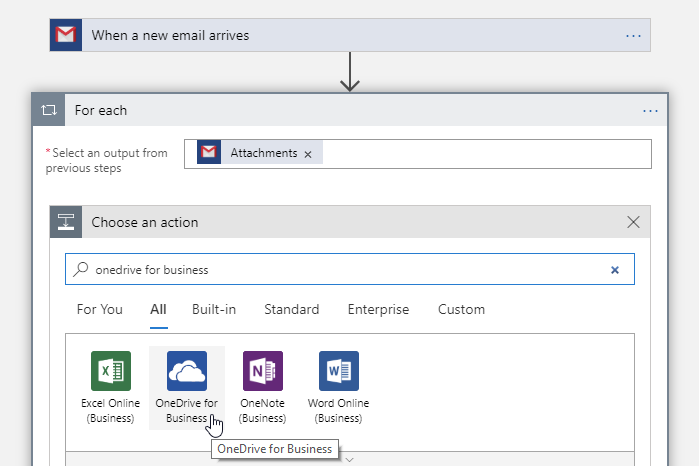
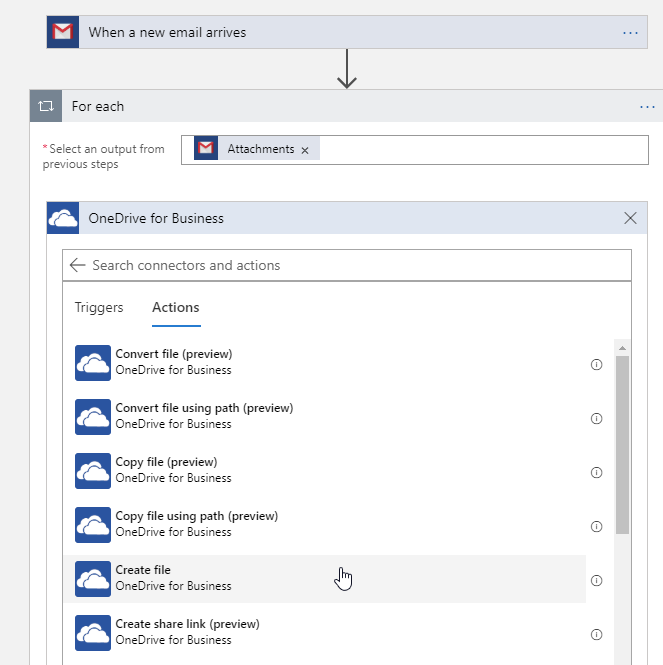
Search for "OneDrive for Business", then select it from the search results.
-
Select Create File from the list of actions.
If you have previously created a Logic App connection to OneDrive, it will be selected by default and you can click the "Change Connection" link at the bottom of the "Create File" pane to change it.
If you haven't previously created a Logic App connection to OneDrive, you will be asked to sign in:- Click the Sign In button to open a popup window that will allow you to sign into your OneDrive for Business account. If you receive an error indicating your Microsoft account doesn't exist, and you're certain you entered the correct account name, then it's possible that you selected OneDrive instead of OneDrive for Business.
- This will create an Azure Resource of type "API Connection" that can be maintained under the All resources option on the main Azure Portal menu.
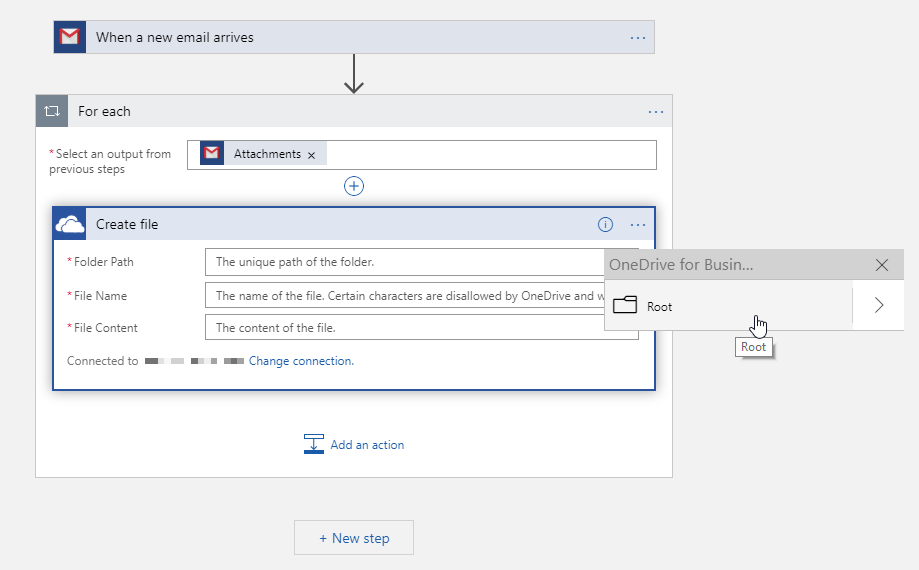
- In the "Create File" pane, click the folder icon to the right of the "Folder Path" box to select a folder in OneDrive to save the email attachment to.
-
Click in the "File Name" box and select Attachments Name from the "Add Dynamic Content" pane that opens.
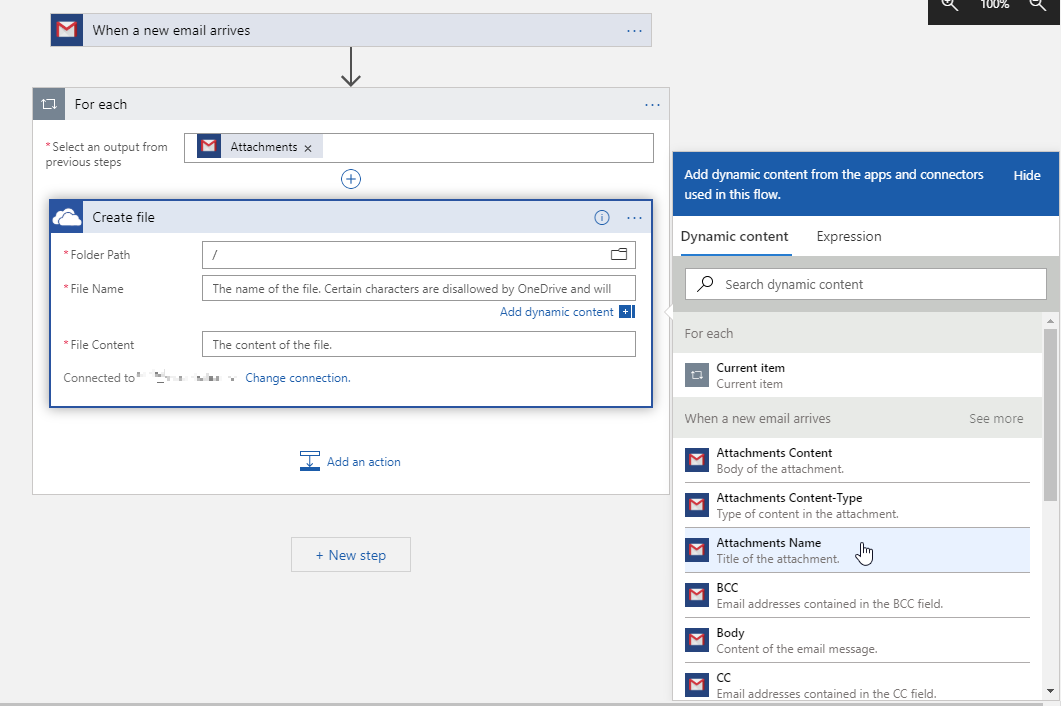
-
Click in the "File Content" box, then click the "See More" button in the "Add Dynamic Content..." pane that opens.
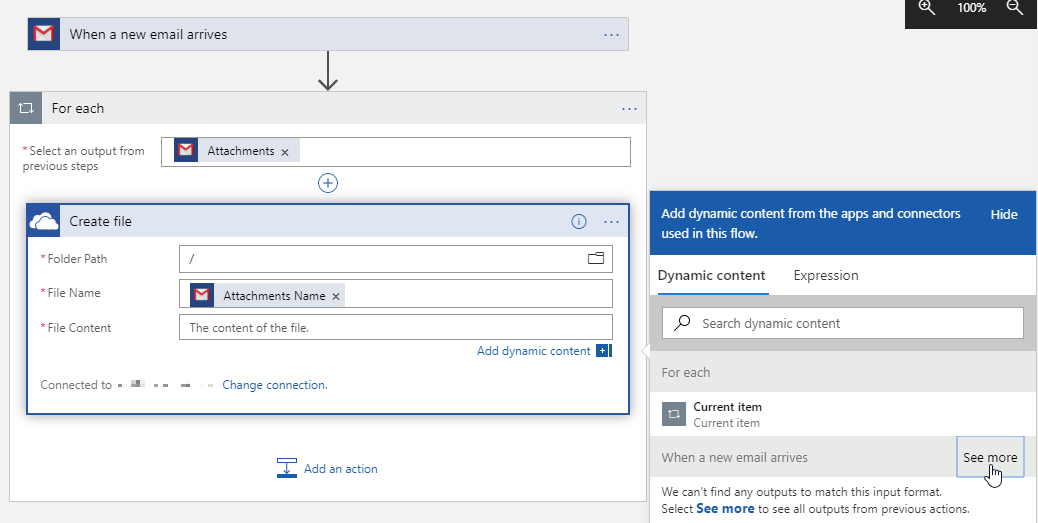
-
Select Attachments Content.
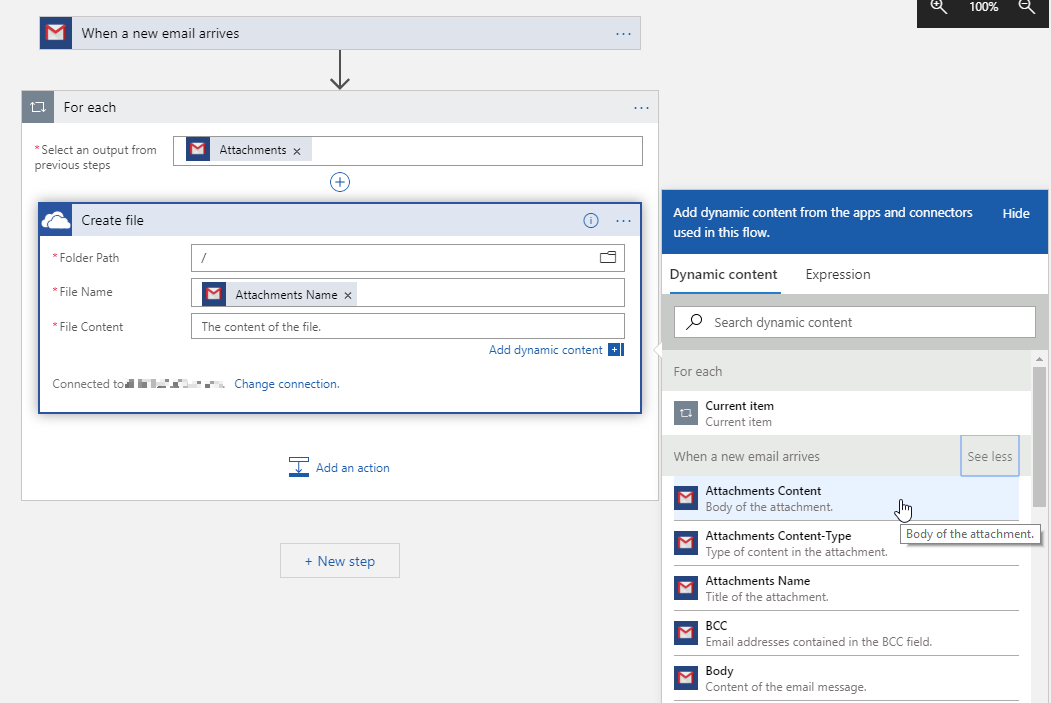
-
Your Logic App should look a bit like the screencap below
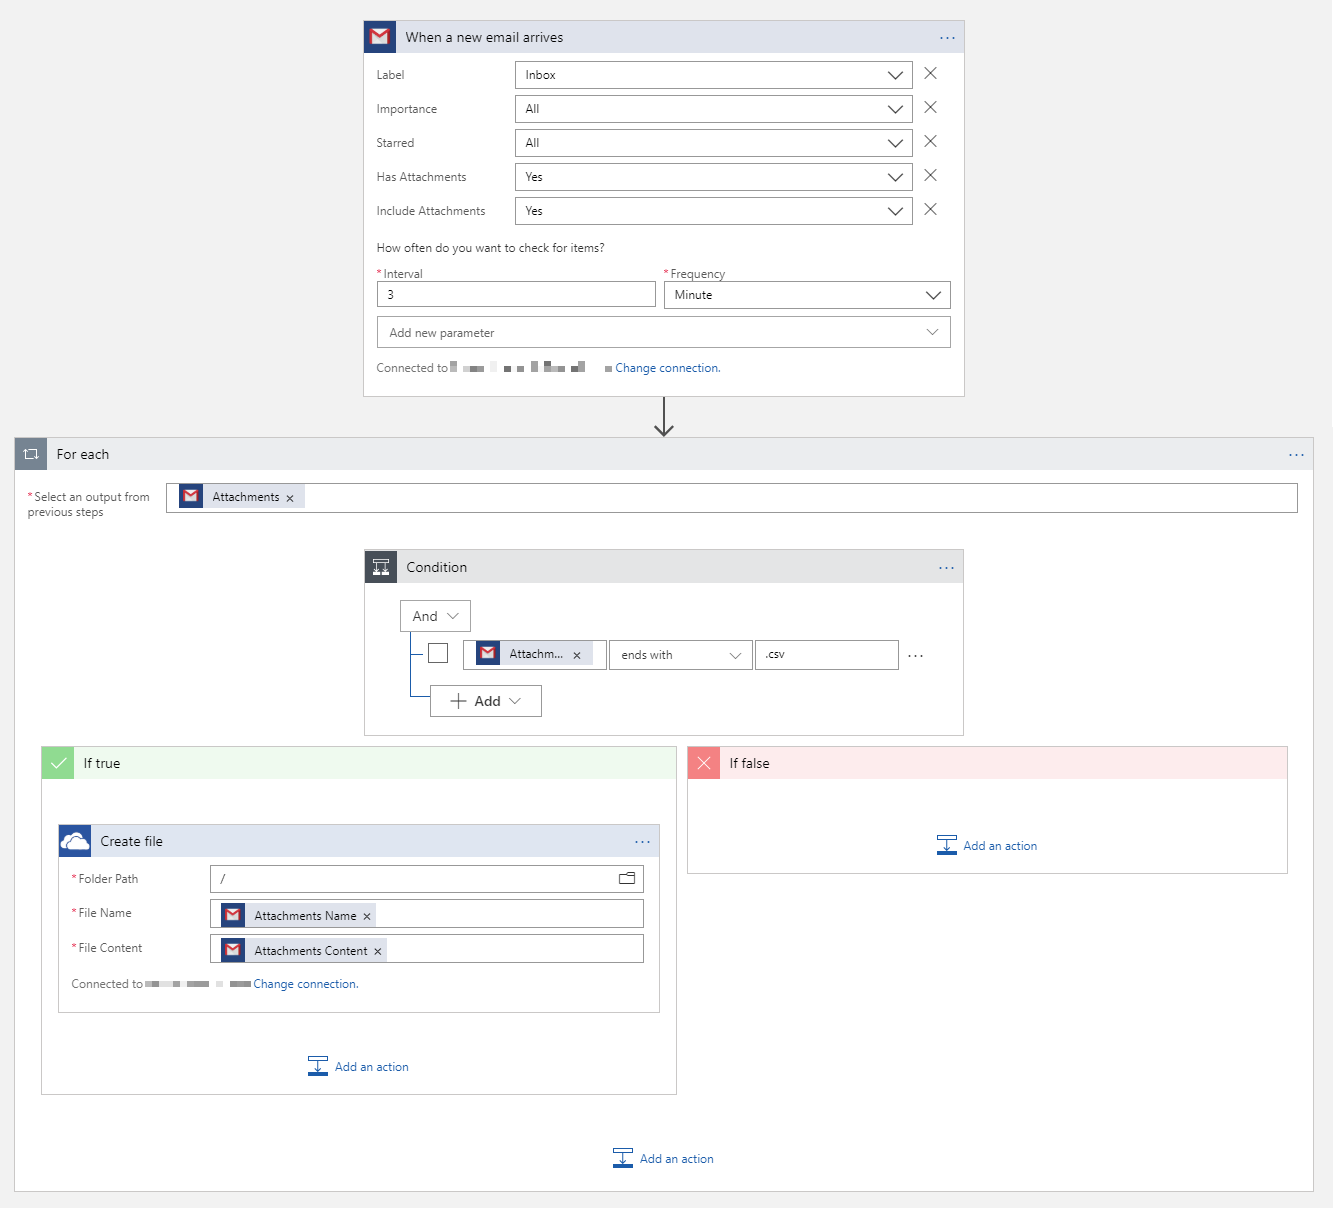
-
Click the Save icon in the upper left of the Logic Apps Designer to save your Logic App.


Testing the Logic App
In order to test the functionality of the Logic App you created in the previous steps:
- Send an email containing a CSV attachment to the email account you configured your Logic App to use.
- Watch the OneDrive account that you attached to the Logic App for the CSV file to appear. It should appear within the time interval that you configured the Logic App to check for new content.
If you have successfully tested your configuration using the steps above, then:
- Issuetrak's Scheduled Reports can now be delivered to an email account regularly monitored by Microsoft OneDrive
- All CSV attachments that arrive via the configured email account are copied to OneDrive
- Your OneDrive account is ready to be linked with Power BI
Integration with Power BI
Now that you've established the foundation necessary to pull your Scheduled Reports into OneDrive, you just need to sign into PowerBI and link it to your OneDrive as a data source. Microsoft provides the necessary documentation for you to import your OneDrive-based reports into Power BI as datasets that can then be manipulated as you see fit, and you can find those steps in the links below:
